Article
How do I get my GST registration certificate online?
GST Registration Certificate is issued to those taxpayers who are registered under GST in India. The traders who have a GST Registration certificate are supposed to prominently display it at the place of their business. Downloading GST Registration Certificate is not a hard thing to do. Here we will take you through the easy steps to download GST Registration Certificate.
How to download GST Registration Certificate?
In order to download the GST Registration Certificate, you are supposed to have the access of the official GST Portal. Once you have the access to the GST portal you can use the following steps to download your GST Registration Certificate: -
Step: 1
Login to the official GST Portal
Step: 2
Click on the LOGIN button, in order to access the User ID and Password page
Step: 3
Enter the correct ‘Username’ and ‘Password’ credentials along with the captcha in the required field and click ‘LOGIN’.
Step: 4
Click on the Services –> User Services –>View/ Download Certificate.
Step: 5
Click on the ‘Download’ button in the screen to download the certificate. The certificate contains all the details on the tax transactions.
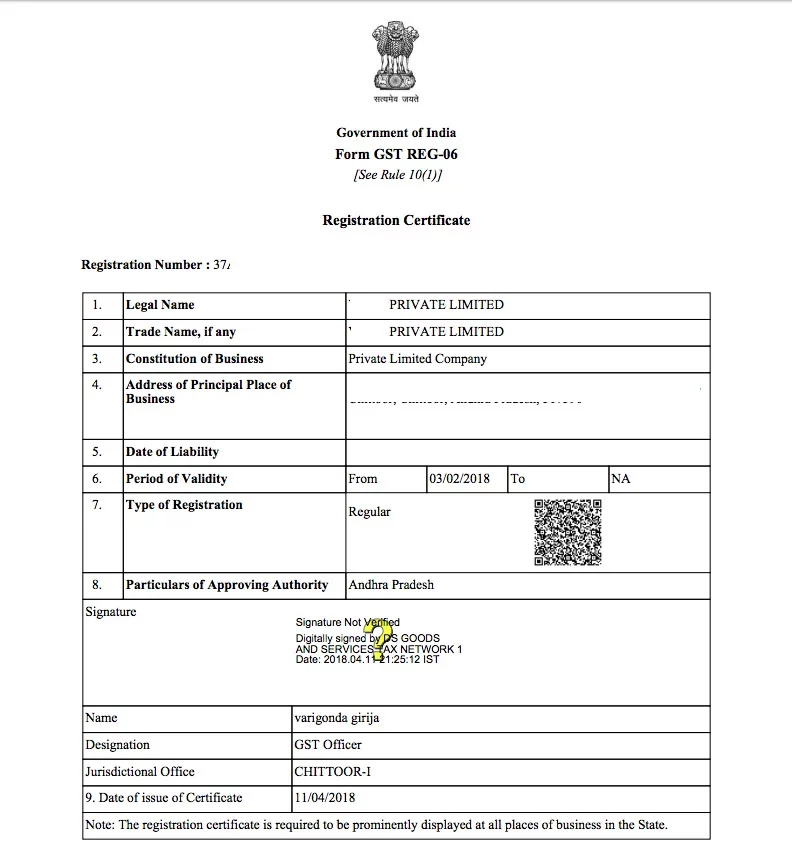
How does a GST Registration Certificate look?
The GST Registration Certificate looks like the image shown below: -
What is the validity of GST Registration Certificate?
GST registration certificates that are issued to the regular taxpayers do not have any expiry date. Hence, as long as the GST registration is not surrendered or cancelled by GST authority, it would continue to remain valid.
However, in case of casual taxable person GST registration or non-resident taxable person GST registration, the validity is restricted to a maximum of 90 Days. The validity can be extended or renewed at the end of its validity period.